Preparing the Chemical Skewers
Have an adult present when you do the experiment, and follow all of the safety precautions, above.
- Several hours before sunset (a day or more is also fine), prepare the bamboo skewers. 3 skewers per chemical would suffice.
- Put a piece of masking tape around the blunt end of each skewer (a total of 12 skewers) like a flag as seen in Figure 1 below. With a pen, write the name of a chemical on each skewer's masking tape label.
- In the end you should have 3 skewers labeled for each chemical.
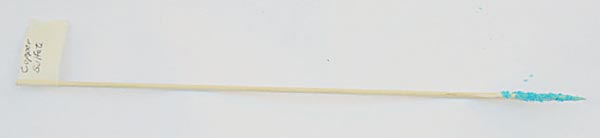 |
| Figure 1. A completed skewer is shown here. Notice the masking tape label at the blunt end, and the copper sulfate coating approximately 1 inch of the tip. |
- Apply a thin layer of glue to the last 1 inch of the tip of a skewer as shown in Figure 2.
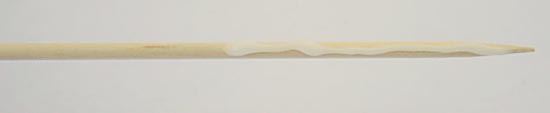 |
| Figure 2. Cover approximately 1 inch of the tip of each skewer with a small amount of glue. Make sure the glue is on all sides of the skewer. |
- While wearing the chemical goggles and disposable gloves, dip the glue-coated tip end of the skewer in the jar of chemical. Twist the skewer back and forth a bit to coat the skewer with the chemical.
- Make sure the name of the chemical on the skewer label is a match for the chemical you are using.
- Repeat steps 5 and 6 until you have made 3 skewers for each of the chemicals.
- Let the skewers dry for at least two hours before performing the flame tests.
Conducting the Flame Tests
- The flame test should be conducted outside, in the dark (or at twilight), on a hard nonflammable surface. Adult supervision is needed.
- Find a hard nonflammable surface outside for the flame test. A driveway, sidewalk, or brick/concrete/cement patio are all examples of a good testing surface.
- Bring the dried chemical skewers (make sure they have dried for at least two hours first) and all other materials outside. You may find it easiest to use a flashlight or other outdoor light while you are getting set up. When you are done setting up and ready to test the skewers make sure to turn off the light(s).
- Place a solid fuel tablet on a square of aluminum foil on your nonflammable surface as shown in Figure 3.
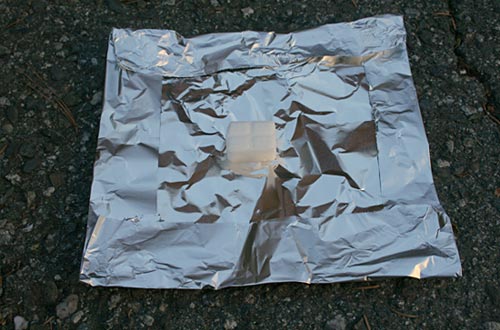 |
| Figure 3. Outside on a nonflammable surface is the ideal place to conduct your flame test. For easy cleanup make sure to but your solid fuel tablet on a square of aluminum foil. |
- As a safety precaution make sure to have a container of water with you. A fire extinguisher would be a fine alternative. If you are using a video camera, start recording.
- Have an adult use a match to light the solid fuel tablet. You may find that laying the lighted match on the foil next to the tablet is the easiest way to get the tablet to start burning. Note the color of the flame in your lab notebook. If you are using a digital camera to document your experiment, take a picture of the burning tablet.
- Once the solid fuel tablet is burning, carefully take a skewer and hold the chemical coated end in the flame. Observe the flame color and record it in your lab notebook. Take a photo if you are using a digital camera for documentation.
- The skewer may also catch fire after a few moments. Simply remove it from the flame and blow it out like a birthday candle. You can also extinguish the skewer in the container of water.
- Repeat step 7 for all 12 skewers (3 per chemical). Record all your observations in your lab notebook.
- When you are done either wait for the solid fuel tablet to burn itself out or extinguish it by carefully putting a heat resistant bowl over the tablet, as shown in Figure 4, for a few minutes.
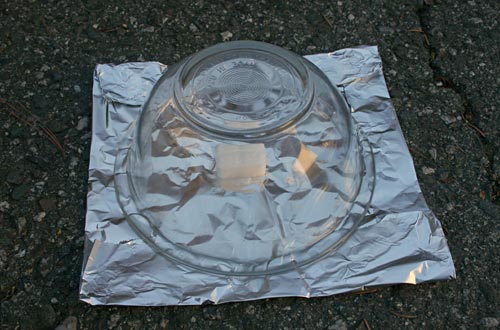 |
| Figure 4. The solid fuel table will burn itself out in under 20 minutes. If you do not want to wait, you can extinguish it by covering it with a heat resistant bowl for 1 minute. This will deprive the fire of oxygen thus causing the flame to go out. Bibliography :
(n.d.). Retrieved from http://www.sciencebuddies.org/science-fair-projects/project_ideas/Phys_p058.shtml
|
No comments:
Post a Comment